When you click on links to various merchants on this site and make a purchase, this can result in this site earning a commission. Affiliate programs and affiliations include, but are not limited to, the eBay Partner Network.
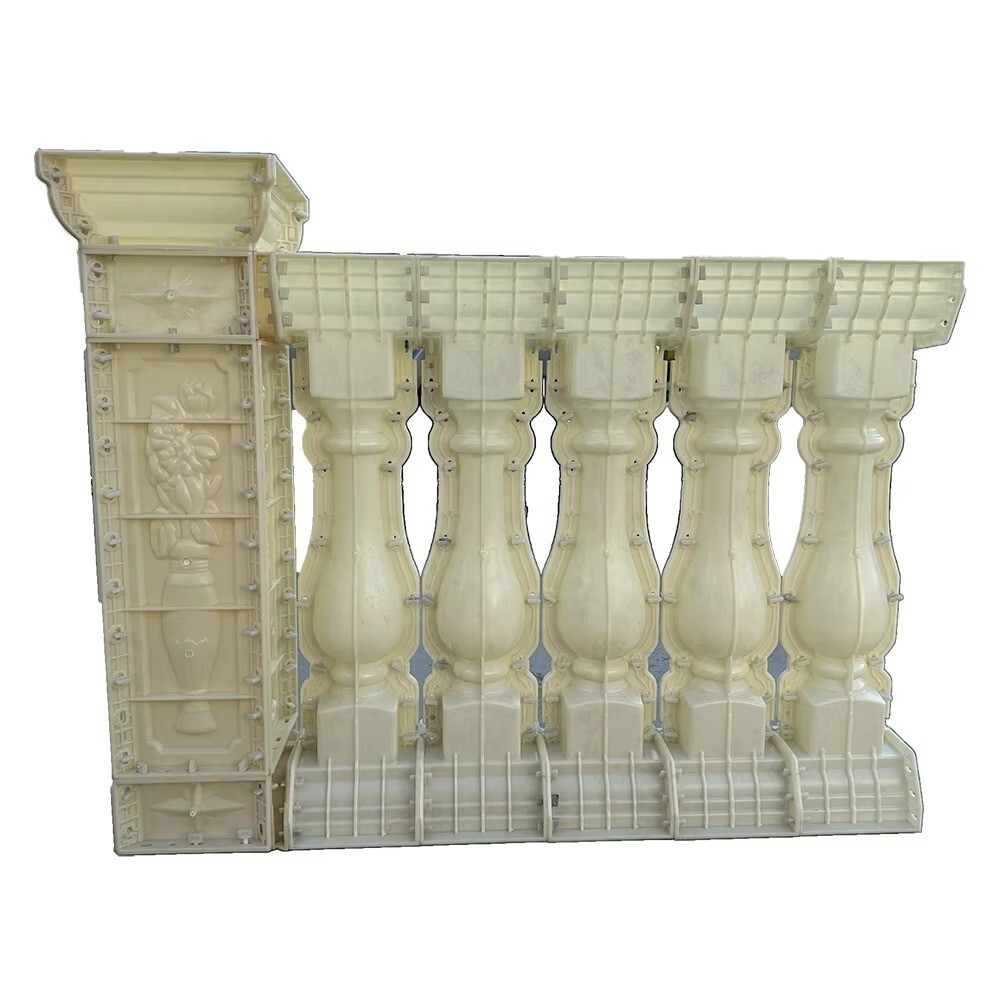
The 89cm roman column railing mold by Reazone Molds is a round ABS guardrail vase handrail designed for balconies and fences. With a length of 39.37 inches and a depth of 9.84 inches, this cast-in-place finish piece adds an elegant touch to any outdoor space. Perfect for creating a beautiful and functional railing system in your yard or garden, this mold allows for a unique and stylish addition to your home and garden decor.When using cement railing molds, following the correct operating procedures is the key to guaranteeing the quality of the finished product and the mold life. The process is mainly divided into four stages of preparation, pouring, demolition and maintenance.
Here are the detailed steps and considerations:
🛠️Step 1: Preparation
· Examine the mold: Make sure the mold is clean, free of oil, completely structured and fully bolted.For combined molds, the bolts need to be tightened before use to prevent leakage.· Painting a decoy: Apply a layer of oil or a professional decoy uniformly to the inner walls of the mold. Let it sit for about 1 minute until it forms a layer of oil film, which can both facilitate subsequent demodeling and protect the mold and ensure the surface of the product is smooth.· Prepare the site: The ground on which the molds are placed must be flat and solid.If a vibrating platform is used, the surface of the platform should also be kept clean and flat.
🚧Step 2: Pouring concrete
· Mixing materials: Mix cement, sand, and gravel in proportion. The ratio of water to cement is usually controlled between 1: 0.3 and 1: 0.4, which can be fine-tuned according to actual needs.· Pouring: Pour the stirred concrete into the mold. Be careful not to fill it all at once. It should be inverted in layers to maintain a uniform distribution and avoid creating voids. The mud surface should normally be 5-10 cm below the edge of the mold to prevent spillage.· Punch the exhaust: This is a crucial step in determining the tightness and strength of the railings.You can use a vibration rod to insert it into the concrete and beat it, or gently hit the surrounding area of the mold with a rubber hammer or mallet, so that the bubbles are fully expelled and the concrete fills every corner of the mold. For large components, if a vibrator is used, it is recommended that the head of the rod be covered with a rubber sleeve to prevent damage to the mold.
⏳Step 3: Conservation and Demolition
· Static solidification: Place the mold at a level when the pouring is complete.Cement syrup usually takes about 24 hours to initially solidify at room temperature, which will vary depending on the temperature and the type of cement.· Dismantle the mold at the right time: It is best to have a concrete strength of not less than 70% of the design strength when dismantling the mold.Use a wooden hammer or leather hammer to hit the assistance when dismantling the mold. Disable a hammer. The unassembled mold should be handled lightly and placed lightly. It is recommended to cushion the bottom with strips of sacks or used tires to prevent breaking the corners of the prefabricated parts or damaging the mold.· Continue maintenance: The concrete railings are still relatively \"soft\" after de-model and need maintenance.Cover a plastic film or grass bag and place it in a well-ventilated, sun-avoided place for moisturizing maintenance, usually for a few days to ensure steady strength growth.
🧹Step 4: Follow-up Cleanup
· Timely cleaning: Immediately after dismantling the mold, clean the remaining cement on the mold.Cement is difficult to clean after dry knots, and it is strictly forofferden to scratch with iron tools.· Scientific removal of dirt: If there are stubborn stains, soak it with diluted hydrochloric acid or oxalic acid and wipe it clean with a soft cloth.· Store properly: After cleaning and drying the mold, it should be placed neatly to prevent squeezing and deformation.
⚠️Special Notes
· Environmental temperature: Prefabricated components are not recommended when temperatures are below 4 ° C to avoid frost affecting the strength of the cement.· Large components: When prefabricating larger, heavier components, the mold is easily deformed.It is recommended to use board clips, cards or specially made iron frames for reinforcement.· Surface treatment: After maintenance is completed, the railing surface can be painted with white paint or warning red paint as needed to achieve both aesthetic uniformity and protective effect.
Hope this guide helps you. If you encounter specific problems in the actual operation, such as the choice of depolymerizer or crack handling, you can always ask me again. Good luck with your production!