When you click on links to various merchants on this site and make a purchase, this can result in this site earning a commission. Affiliate programs and affiliations include, but are not limited to, the eBay Partner Network.
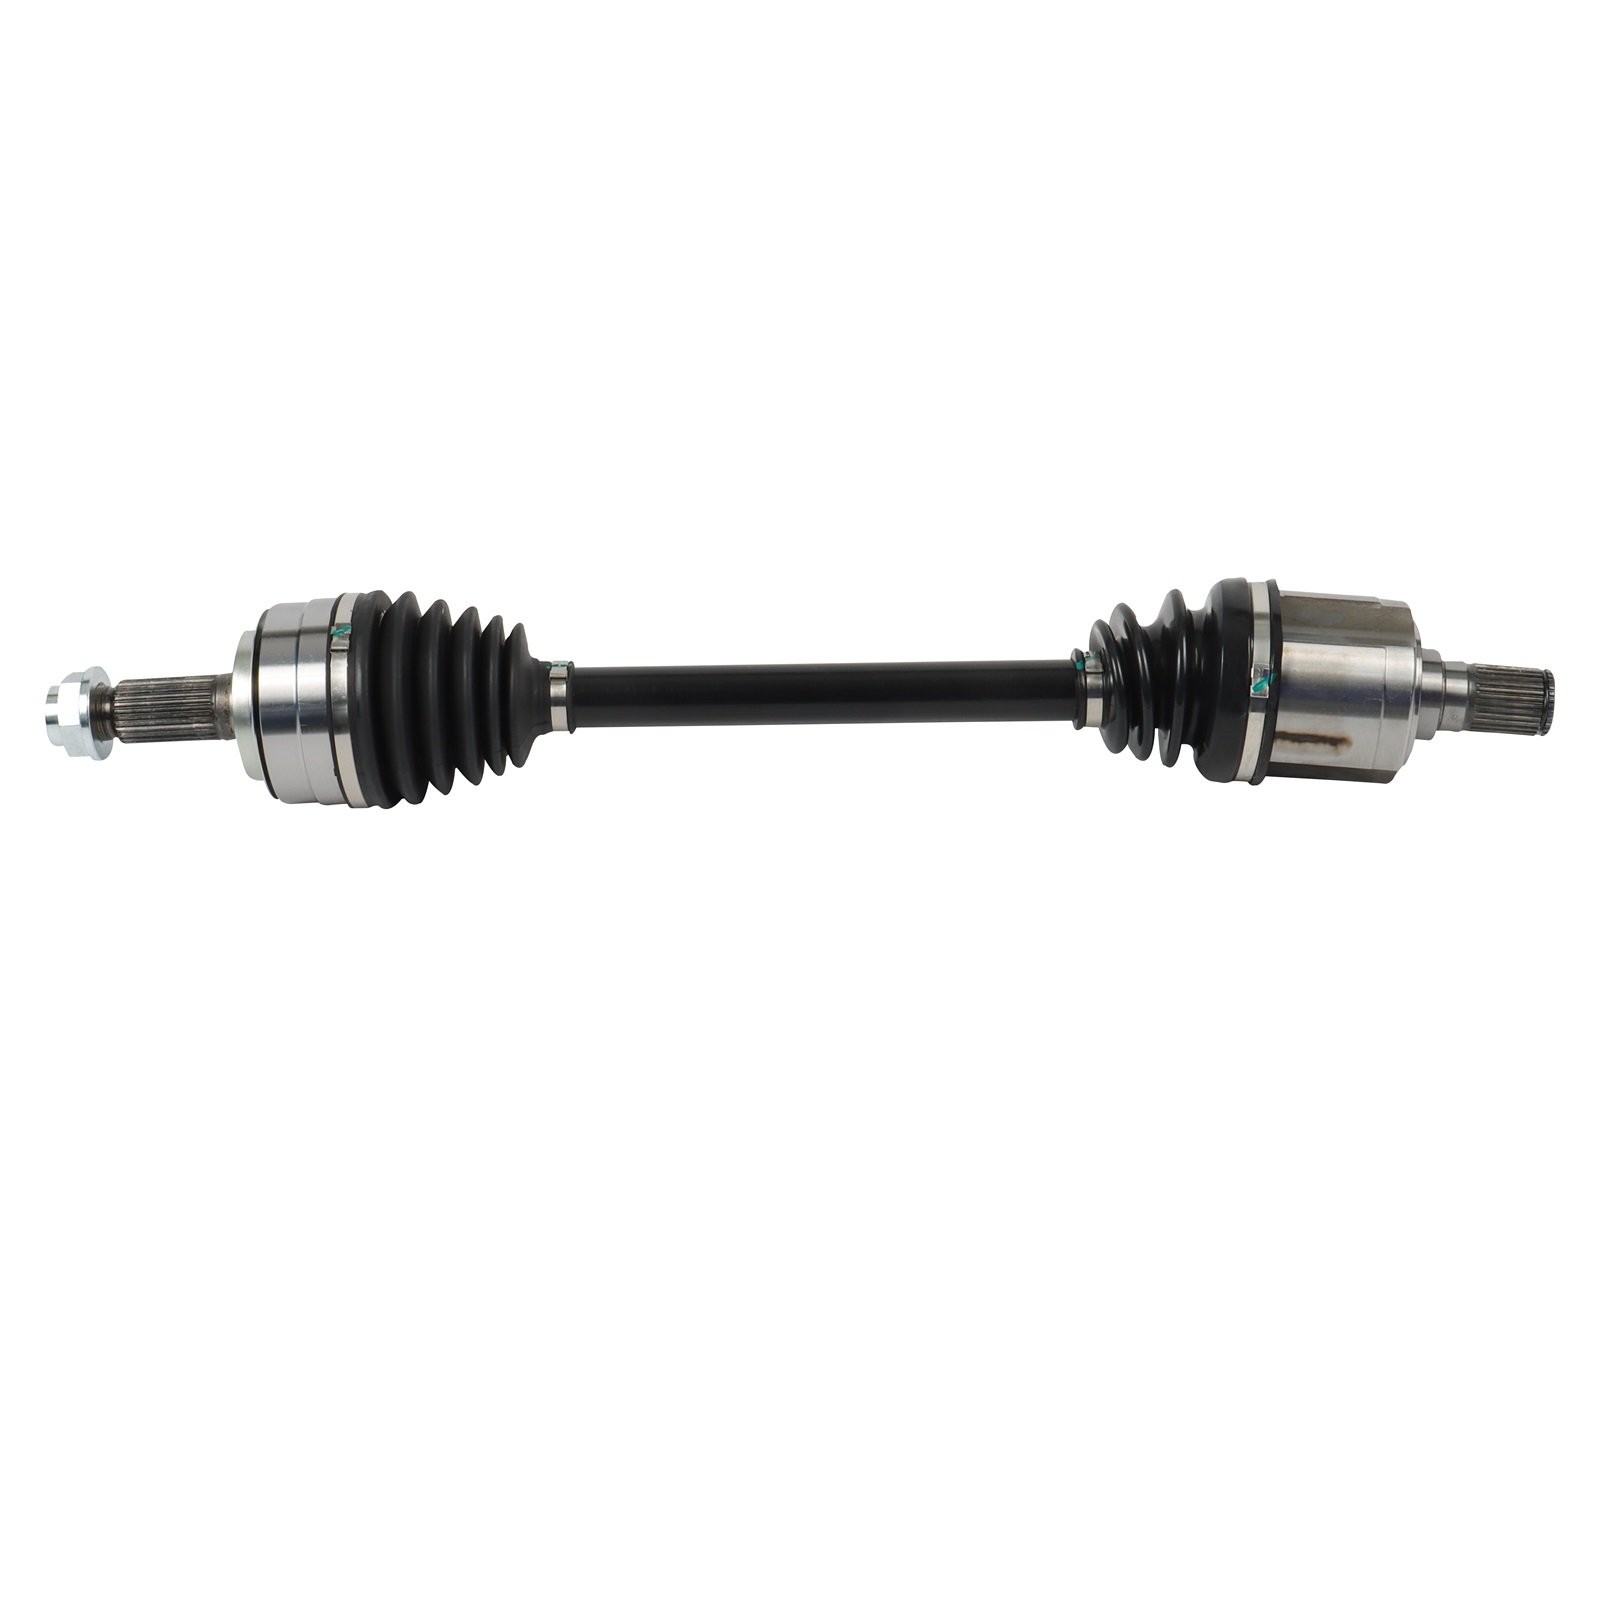
Fitment chart:For Acura TLX 3.5L 2015-2019 Front LeftFeature:100% Weather Proof, Sturdy.Perfect fitment with no modification required.Great quality and great Fitment.Correct Connector No cutting or splicing.Strict quality control standards to Build and test.Easy installation, Replace directly. No modification needed.No installation instruction included, professional installation is highly recommended!What Are The Signs Of a Failing CV Axle? Front Driver CV Axle Assembly for 2015-2019 Acura TLX 3.5L Updated Design
Fitment chart:
For Acura TLX 3.5L 2015-2019 Front Left
Feature:
100% Weather Proof, Sturdy.
Perfect fitment with no modification required.
Great quality and great Fitment.
Correct Connector No cutting or splicing.
Strict quality control standards to Build and test.
Easy installation, Replace directly. No modification needed.
No installation instruction included, professional installation is highly recommended!
What Are The Signs Of a Failing CV Axle?
You may notice a clicking sound when turning the wheel or accelerating and feel a vibration as the vehicle is in motion. You may also notice grease on the inside of your wheels or tires as the lubricant leaks out from a damaged CV boot.
CV axle replacement
Pro Tip
Additional specialized tools such as tie-rod end pullers, ball joint removers, and vehicle-specific sockets may be required
(1) Slightly loosen the wheel lug nuts. Raise and secure the vehicle. Remove the wheels. Remove the cotter pin. Unlock the spindle nut safety fastener according to the repair manual instructions.
Tip: Leave one side assembled while you work on the other so you can remember how things go back together.
(2) Loosen the nut with a proper socket and breaker bar. Another bar or large screwdriver wedged between the lug nuts can help hold the wheel in place. Brake application simplifies the wheel turn issue.
(3) On some vehicles, the brake caliper and rotor must be removed before proceeding. Refer to your repair manual for your vehicle's requirements. If you find yourself having to remove the brake caliper, suspend it from a point on the fFor Rame or wheel well with a length of coat hanger wire so it doesn't hang from its brake hose.
(4) Remove the cotter pin and castle nut from the lower ball-joint. Disconnect the ball-joint from the steering knuckle with a removal tool (your pickle fork is likely to come in handy here). Swing the knuckle and hub outward to free the outboard axle assembly.
(5) Gently wedge a pry bar or a large flat blade screwdriver between the axle and transmission. Carefully pry the axle assembly away from the transmission. Be careful not to damage any transmission seals.
(6) The drive axle assembly should now slide right out. Take a good look at the drive assembly location, and then remove. The new one will go back the same way.
(7) Grease the splines before insertion with gear grease. Insert the replacement drive axle assembly and reverse the disassembly process. Torque all fasteners to specification. Don't forget to use new cotter pins.
Notes:
Please check whether this item can fit on your car before purchasing
Item SpecificsBrand egnetpartsManufacturer Part Number EG18276101xInterchange Part Number HO-8590,44306TZ3A01Manufacturer Warranty 1 YearCalifornia Prop 65 Warning YesFitment Type Direct ReplacementCompatible Makes For AcuraModel TLXYear 2015-2019Engine V6 3.5LNote Updated DesignPlacement on Vehicle Front LeftPackage Quantity 1
Payment
Please check your adress before payment.
Shipping All domestic orders will be shipped via USPS, UPS or Fedex from our US warehouse and usually arrives to your door in about 2-7 business days.We do not ship to P.O. Boxes, APO/FPO or Military Mail Box.Returns 30 Days Free Return and Money BackContact Us We fully understand how challenging it is to be a successful transaction. If you are not satisfied with our products, please do not hesitate to tell us, our sales representatives will try the best to make you happy. Customer satisfaction is our priority consideration!Warning
WARNING:Please confirm compatibility again.
Shop CategoryStore Home Body Kits◈Trunk Spoiler◈Roof Spoiler◈Bumper Lips◈Truck Accessories◈Weatherstrip Seal◈Universal◈Rocker Panels◈Other Window Motors & Left & Right◈Rear Left & Right Turbos & Parts◈Turbo Cartridge CHRA◈Turbocharger◈Other Off-Road Parts▷CV Axle Assembly♢Left/Driver Side♢Right/Passenger Side♢Front Left & Right♢Rear Left & Right◈Rear Differential Assembly Drivetrain Parts◈Transfer Case Motor◈Transfer Case PTO Units◈Differential & Parts Wheel Rim CV Axle Headlight Assembly throttle body fuel injector Ignition Coil thermostat Swich Spark PlugsBest Sales FWD Front Passenger CV Axle Assembly for 2017-2018 Hyundai Santa Fe Sport 2.4L USD 85.49 AWD Front Driver & Passenger CV Axle Assembly For Nissan Rogue 2.5L 2014-2020 USD 131.49 Front Driver CV Axle Assembly for 2018-2021 Hyundai Tucson 2.4L USD 79.35 Front Driver & Passenger CV Axle Assembly for Scion xB 1.5L 2004-2006 USD 122.74 Front Driver CV Axle Assembly for Infiniti for QX60 2014-2015 V6 3.5L USD 74.49 Newly Listed For Scion 2004 2005 2006 xB Base w/Motor Window Regulator Replacement USD 53.55 2 CV Axles Fits Can-Am Commander 800R 2011-2013 Rear Left & Right USD 108.55 Driver Rear Fits 2009-2014 Honda Fit Window Regulator w/ Motor 751-623 USD 50.55 For Toyota for Corolla 2003-2008 Passenger Side Front Window Motor Replacement USD 25.55 For 2011-2015 Can-Am Commander 1000 Rear Left/Right CV Axle Assembly 1PC USD 63.55 Terms & ContactPayment PolicyShipping PolicyReturn PolicyFAQAbout Us Front Driver CV Axle Assembly for 2015-2019 Acura TLX 3.5L Updated Design
Fitment chart:
For Acura TLX 3.5L 2015-2019 Front Left
Feature:
100% Weather Proof, Sturdy.
Perfect fitment with no modification required.
Great quality and great Fitment.
Correct Connector No cutting or splicing.
Strict quality control standards to Build and test.
Easy installation, Replace directly. No modification needed.
No installation instruction included, professional installation is highly recommended!
What Are The Signs Of a Failing CV Axle?
You may notice a clicking sound when turning the wheel or accelerating and feel a vibration as the vehicle is in motion. You may also notice grease on the inside of your wheels or tires as the lubricant leaks out from a damaged CV boot.
CV axle replacement
Pro Tip
Additional specialized tools such as tie-rod end pullers, ball joint removers, and vehicle-specific sockets may be required
(1) Slightly loosen the wheel lug nuts. Raise and secure the vehicle. Remove the wheels. Remove the cotter pin. Unlock the spindle nut safety fastener according to the repair manual instructions.
Tip: Leave one side assembled while you work on the other so you can remember how things go back together.
(2) Loosen the nut with a proper socket and breaker bar. Another bar or large screwdriver wedged between the lug nuts can help hold the wheel in place. Brake application simplifies the wheel turn issue.
(3) On some vehicles, the brake caliper and rotor must be removed before proceeding. Refer to your repair manual for your vehicle's requirements. If you find yourself having to remove the brake caliper, suspend it from a point on the fFor Rame or wheel well with a length of coat hanger wire so it doesn't hang from its brake hose.
(4) Remove the cotter pin and castle nut from the lower ball-joint. Disconnect the ball-joint from the steering knuckle with a removal tool (your pickle fork is likely to come in handy here). Swing the knuckle and hub outward to free the outboard axle assembly.
(5) Gently wedge a pry bar or a large flat blade screwdriver between the axle and transmission. Carefully pry the axle assembly away from the transmission. Be careful not to damage any transmission seals.
(6) The drive axle assembly should now slide right out. Take a good look at the drive assembly location, and then remove. The new one will go back the same way.
(7) Grease the splines before insertion with gear grease. Insert the replacement drive axle assembly and reverse the disassembly process. Torque all fasteners to specification. Don't forget to use new cotter pins.
Notes:
Please check whether this item can fit on your car before purchasing
Item SpecificsBrand :egnetpartsManufacturer Part Number :EG18276101xInterchange Part Number :HO-8590,44306TZ3A01Manufacturer Warranty :1 YearCalifornia Prop 65 Warning :YesFitment Type :Direct ReplacementCompatible Makes :For AcuraModel :TLXYear :2015-2019Engine :V6 3.5LNote :Updated DesignPlacement on Vehicle :Front LeftPackage Quantity :1
PaymentShippingReturnsContact UsWarning
Please check your adress before payment.
All domestic orders will be shipped via USPS, UPS or Fedex from our US warehouse and usually arrives to your door in about 2-7 business days.We do not ship to P.O. Boxes, APO/FPO or Military Mail Box. 30 Days Free Return and Money Back We fully understand how challenging it is to be a successful transaction. If you are not satisfied with our products, please do not hesitate to tell us, our sales representatives will try the best to make you happy. Customer satisfaction is our priority consideration!
WARNING:Please confirm compatibility again.
All rights reserved.